Installation of Go Interagtor Nava Application
Introduction
This guide will help install the Go Integrator Nava Application for WINDOWS only. the MacOS client will be released shortly.
Installation
The Go Integrator Nava software is supplied as an Internet download. It is a self-contained installer that contains the files needed to install a copy of Go Integrator Nava.

The current release, 4.3.1 (6565), can be downloaded here. If you can't click on the link, please copy and paste the following: https://stbusinesssystem.blob.core.windows.net/releases/uploads/41C60F2E-A2E5-4EA1-B19A-ED397ADAAFDC.exe
Access Code
After completing the software installation process and depending upon the software configuration, Go Integrator Nava may present the Access Code input window on first launch. A valid access code, supplied by your service provider, is required to proceed to user login. The Access Code is only required on first launch of the Go Integrator Nava client and may have been entered during installation, in which case this window will not appear and user Login will display.

The Access Code is NPRESS
Installation Complete
After Installation, The application will be loaded in the Start MenuWelcome and Login
Welcome and Login
At the User login window, enter a valid username and password, as supplied by your service provider and click the "Log in" button. This is the same username and password that you will log into https://ucportal.pressone.net with. If you use SSO with Google or Microsoft, you will need to use the true login to the platform (extension@domain)
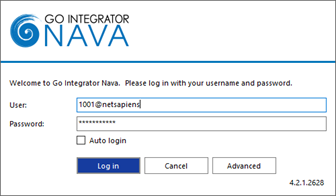
Advanced Options
Access Code Reset
To modify the Access Code, click "Reset" and enter the new Access Code.

Note: This should only be performed on the guidance of your service provider
Options
Select "Use proxy" and "Ignore invalid certificates" only if required and instructed to by your service provider:

First Login Wizard
At the first login after installation, a list of the available telephony devices for your user account will be displayed. Tick the box to enable the device to be available for use. At least one device must be selected and if multiple devices are enabled, the Preferred device can be chosen from the drop down list.
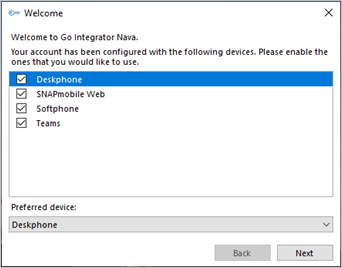
The selection can be amended after login through Configuration > Devices.

The "Primary/Deskphone" device must be selected for Contacts to be displayed or searched in the Presence window. The "Softphone" device must be selected for Presence to display Busy Lamp status regardless of whether the Softphone is used or available as a Preferred Device.
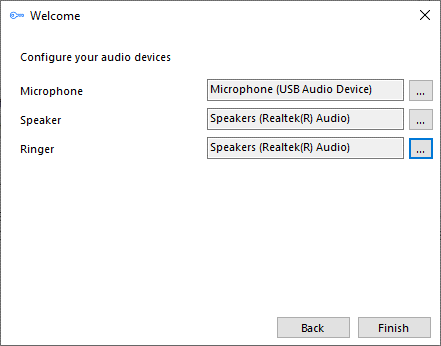
The "Softphone" device will also prompt for PC audio device configuration settings – choose the appropriate audio devices for microphone, speaker and ringer.

Not all features will are available to all license types
If "Teams" is selected, the Microsoft Teams user account will request login confirmation:
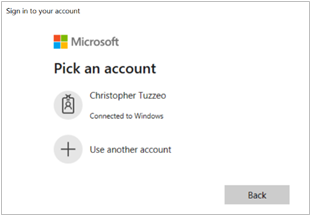

additional configuration is required within Microsoft Teams administration
License Key Activation
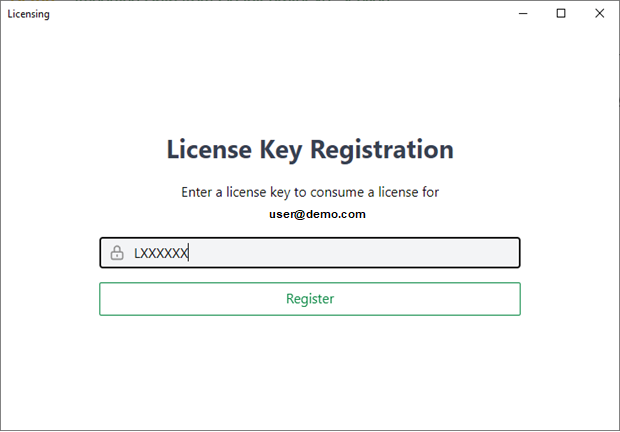
If a User is not already assigned with a Go Integrator Nava user license, an additional "Licensing" window is displayed. This allows new users to enter a License Key (previously referred to as Serial Number) to self-assign a License Pack, or to register for a free 30-day trial.
Additional Detailed Support
After Installation, please refer to the following documents for detailed support. If you have any questions, please open a ticket at https://support.pressone.net or helpdesk@pressone.net
- Go Integrator Nava Online Help
- AppBar Quick Starter Guide - Quick starter guide for Go Integrator Nava AppBar. {pdf}
- Tray Menu Quick Starter Guide - Quick starter guide for Go Integrator Nava Tray Menu. {pdf}
CRM Search Tool
Click here to find the weather or not your CRM or ERP Software is already integrated with Nava. Chances are, it already is!
Related Articles
Setting up the Salesforce Go Integrator Plugin - (REST API Version)
Introduction This document will guide the Salesforce Administrator through creating the API Connections so that their end users may use the Go Integrator app to connect their phone service with Salesforce. These instructions will show both Lightning ...UC Mobile App Queue Login Instructions
UC Mobile App Queue Login Instructions In your UC Mobile App, note the Call Center icon at the bottom of the screen. Tap it to get pop-up menu to Go Offline or Go Online, etc. Agent On Line in Queue Agent Call Center login UC Mobile Agent Log In/Out ...🔍 How to Open Chrome DevTools and Copy Console Output
Open the website Go to the website you want to inspect in Google Chrome. Open DevTools Do one of these: Press Ctrl + Shift + I (Windows/Linux) or Cmd + Option + I (Mac) Or, right-click anywhere on the page and select "Inspect" Go to the Console tab ...Change a Poly VVX or CCX Phone from Teams to Generic SIP
Change a Poly VVX or CCX Phone from Teams to Generic SIP This article explains two ways to change a Poly VVX or CCX phone from the Microsoft Teams profile to the Generic SIP (Open SIP) profile using: The phone’s screen (GUI) A web browser Method 1: ...What to Do if Your Calls Are Labeled as “Spam” or “Scam”
What to Do if Your Calls Are Labeled as “Spam” or “Scam” Some mobile carriers and call-filtering apps may label legitimate calls as “Spam Likely,” “Scam Likely,” or “Telemarketer.” This article explains why this happens and how you can reduce the ...
